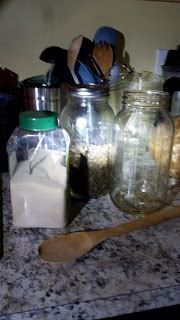
Kombucha: Decanting the Finished Kombucha

Once the kombucha has reached the level of sweetness and effervescence you desire, as well as a cloudiness which is demonstrative to mature kombucha, the time has come to decant it. As the aim is to not only have kombucha to drink but have the makings of future batches, some equipment is needed. Fortunately, everything can be found in your own kitchen.


EQUIPMENT

Small mixing bowl (ceramic or glass)
Measuring cup
Drinking containers (glass is best)
Brewing vessel


DIRECTIONS

Remove the coffee filter or cloth from the brewing vessel and place the SCOBY in the mixing bowl.

Measure out two cups of kombucha and reserve.

Pour the kombucha into the drinking vessel. Be careful not to fill the drinking vessel to the top as the kombucha will have a tendency to escape from the vessel thanks to the effervescence. Also, do not fasten the lid too tightly as the pressure within could either damage the vessel or blow off the lid.

Pour the two cups of kombucha from the measuring cup back into the brewing vessel and add the SCOBY. Repeat the steps for brewing kombucha, using all the same ingredients except the store-bought kombucha.

As the SCOBYs reproduce, you may acquire more brewing vessels to make additional gallon batches of kombucha. 

Your journey to creating your own kombucha is complete!

Kombucha: How to Brew Kombucha

Once you have a SCOBY, the world is your oyster--or at least the near endless capacity to make your own kombucha.

Like creating the SCOBY, a container is needed. Glass is best, as metal tends not to be conducive to SCOBY health, and plastic can create its own issues. Gallon glass jars are available at many stores, including the gallon Ball jar, but in a pinch, any gallon glass vessel will work, including tall glass vases, which can be found in many thrift stores.

A vase doing double-duty as a brewing vessel


EQUIPMENT

Large pot
Spoon
Metal mixing bowl
Gallon jar or vessel
Measuring spoons
Measuring cup
Coffee filter or T-shirt scrap
Rubber band


INGREDIENTS 

Bottle of organic, unpasteurized kombucha (plain is best, like this one)
One cup raw, organic sugar
One tablespoon loose organic tea (I use either Davidson's Organic Imperial Green or Earl Grey) or four tea
        bags of organic green or Earl Grey tea
One gallon unfluoridated water


DIRECTIONS

Add the water to a pot and bring to boil.

Put the tea and sugar into the metal mixing bowl, and pour in the boiled water, stirring until the sugar is dissolved.

Pour two cups of prebrewed kombucha to the gallon jar and add the SCOBY.

When the contents of the metal mixing bowl have cooled, remove the tea bags, and pour the contents into the glass vessel. If using loose tea, pour the contents through a strainer.

Cover the glass vessel with a coffee filter or T-shirt scrap, fastening it in place with the rubber band.

Place the jar or bowl in a dark corner of a room, and let stand from five days to two weeks, depending on the seasons and your preference on sweetness. In summer, even in Maine, the kombucha can be ready in five to seven days. Winter in Maine slows the process to over a week to two weeks.

Test the kombucha by inserting a straw past the SCOBY. The finished kombucha should have an effervescence similar to seltzer water as well as a level of sweetness.  


A note on kombucha:

This will be the last time you will need to use prebrewed kombucha. Once you have completed your first batch of kombucha, you have the ingredients to make future batches: the SCOBY and kombucha.

Kombucha: The SCOBY


Thanks to eating primally for nearly two years (inspired by former Mainer Mark Sisson and his site Mark's Daily Apple) an interest in kombucha seemed a natural progression. However, as buying it pre-brewed was rather costly, thoughts soon turned to brewing it from scratch. Unlike cheese, the equipment is far less specialized, and after the first bottle of brewed kombucha to use as a starter, the ingredients to create future batches are quite inexpensive. And, as SCOBYs (Symbiotic Colony Of Bacteria and Yeast) can be rather prolific, it's not necessary to buy more after the first SCOBY is created. Plus there's lovely things one can do with SCOBYs if one finds oneself in possession of more SCOBYs than one has brewing bottles (something for a future post)...

As one needs a SCOBY to have one's own home-brewed kombucha, here's the recipe to begin:


EQUIPMENT

Large pot
Spoon
Glass jar
Measuring spoons
Measuring cup
Coffee filter or T-shirt scrap
Rubber band
Strainer (if using loose tea)


INGREDIENTS 

Bottle of organic, unpasteurized kombucha (plain is best, like this one)
Two tablespoons raw, organic sugar
One tablespoon loose organic tea (I use either Davidson's Organic Imperial Green or Earl Grey) or two tea
        bags of organic green or Earl Grey tea
Two cups unfluoridated water


DIRECTIONS

Add the water to a pot and bring to boil.

Put the tea and sugar into the jar or bowl, and pour in the boiled water, stirring until the sugar is dissolved.

When the contents have cooled, remove the tea bags, or pour the liquid through a strainer if using loose tea. Add the bottle of kombucha to the jar or bowl and stir again.

Cover the glass bottle or bowl with a coffee filter or T-shirt scrap, fastening it in place with the rubber band.

Place the jar or bowl in a dark corner of a room, and let stand for two weeks.

The result will be the necessary building block of all future batches of kombucha: the SCOBY. 

The SCOBY


A note on SCOBYs:

SCOBYs can be dehydrated in the oven at a low temperature or in the dehydrator, which makes them highly portable--handy should one expect to be from home for weeks and unable to bring one's brewing vessels. They can even be made into fruit leather that's not only delicious but good for you as well, since the probiotic properties of the SCOBY are maintained.

Avocado Mayonnaise


Buying mayonnaise has become more challenging since last August, as there are very few in the stores which don't contain processed oils such as vegetable oil, soybean oil and more. Even the ones that contain olive oil also include the other oils also, though in lesser amounts. Seeing a jar of avocado mayonnaise in the local health food store was a revelation. And, since we have avocado oil at home, I was inspired to make my own.

The recipe came from an old standby, Root Cellaring, Natural Cold Store of Fruits and Vegetables. Because of a lack of honey and dry mustard, I used maple syrup and brown mustard instead, and doubled the recipe to make just over a half a quart. The result is yummy and a hit with the family.


INGREDIENTS:

4 egg yolks
1 teaspoon brown mustard
2 tablespoons maple syrup
4 tablespoons vinegar (I used white)
1 tablespoon lemon juice
2 cups avocado oil


EQUIPMENT:

Food processor of blender
Measuring spoons
Measuring cup
Spatula
Canning funnel (optional)
Jar 


Separate the whites of the eggs from the yolk.


Add the brown mustard,


maple syrup,


vinegar,  and lemon juice,


then blend together.


Slowly pour the oil into the mixture, and blend for five minutes or more. The mayonnaise will become stiffer, and the various tastes will meld together. If the vinegar still has a bite when you taste it, continue blending the mixture until this becomes less pronounced.


The completed avocado mayonnaise... 


Paleo Stir Fry

A fan of stir fry, I decided to make one with cauliflower as the "rice". It also gave me an opportunity to use up the chicken breasts my husband made the night before as well as part of the puffball mushroom my parents gave to us. The result: judging from the empty wok, a success!


Ingredients:

Cauliflower
1 onion
Garlic (the amount is up to you--I used 4 cloves)
2 carrots
2 stalks celery
Butter
Coconut oil
Turmeric
Ground pepper
Mushroom soy


Directions: 

Cut the cauliflower into florets and place them into the bowl of a food processor.
 Blend until the cauliflower becomes rice".
Set aside.
 Chop up the onions,
garlic,
carrots,
and celery.
Chop up whatever other ingredient you would like to add. In my case, a portion of the puffball mushroom,
 and chicken breast.
Add butter and coconut oil to the pan and heat.
Add the onions, garlic, and carrots and cook until soft. Add turmeric, ground pepper, and mushroom soy to the wok.
Add the celery and other ingredients and stir until combined.
Add the cauliflower rice and stir until soft. Covering the wok and lowering the heat helped to achieve a more rice-like consistency for the cauliflower. 
Enjoy!


Kale Hummus

Hummus is easy to make, and so delicious and nutritious. And, since there are twenty-three Russian kale plants in the kitchen garden, it seemed a good idea to incorporate them. This recipe looked perfect thanks to its simplicity. It was very delicious as well, and it goes well with baguettes or chopped vegetables.


Ingredients

4 cups kale
1 can (15 ounce) garbanzo beans or chick peas
3 tablespoons tahini
2 garlic cloves
2 tablespoons honey 
12 teaspoon salt 
14 teaspoon freshly ground pepper
5 tablespoons olive oil
2 tablespoons lemon juice


Equipment 

Food processer
Garlic press
Measuring cups
Measuring spoons

 
Instructions

Wash the kale leaves and tear them into small pieces.


Measure them then add  them to the bowl of the food processor.


Process them until smooth.


Add the chick peas,


the tahini,

the pressed garlic cloves,

the lemon juice, salt and ground pepper and blend until smooth.

Enjoy!

Gardens...

It's that time of year again...

Progress in the kitchen garden was swift, comprising of twenty-three varieties of white, frilly, and red Russian kale, five varieties of lettuce, three varieties of arugula, and beets. As before, Duane's cherub forms the centerpiece.

 The beginning stages
In June


The back garden is doing well also with its crop of asparagus, raspberries, blueberries, and other plants that couldn't fit in the kitchen garden.


Most of the plants are heirloom and sourced from Fedco as either seeds or young plants from the Fedco Tree Sale and, in the case of the asparagus, Paris Farmer's Union.

Already the kitchen garden is providing ingredients for salads, meals, the green smoothies and will be for fresh vegetable rolls. Yum.

May this time of year last...